How to Install PrConvert on Wordpress
1 minutes read
Installing PrConvert on Wordpress
In this post I will explain to you how to install PrConvert on Wordpress. At first It might all seem a bit overwhelming, take your time and don't push yourself. I will keep this beginner friendly.
Now, first, you'll need to make a campaign.
This is done in the dashboard. Once in the Dashboard, You'll have to click a button containing the text: "Create Campaign" and click it.

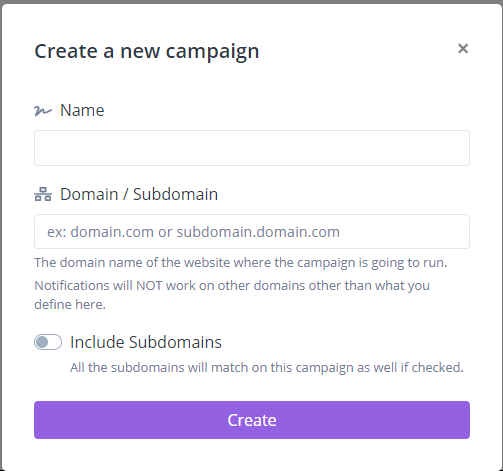
Once you've clicked the button a small window will Appear.

Now, what you write at "Name" Isn't that important, but I rather write something usefull that helps me locate that certain campaign later on, especially when working with multiple clients.
At the Domain section, write the Root domain you are planning to use in this campaign, unless you are planning to use a subdomain.
That said, you can target all the subdomains by clicking "Include Subdomains".
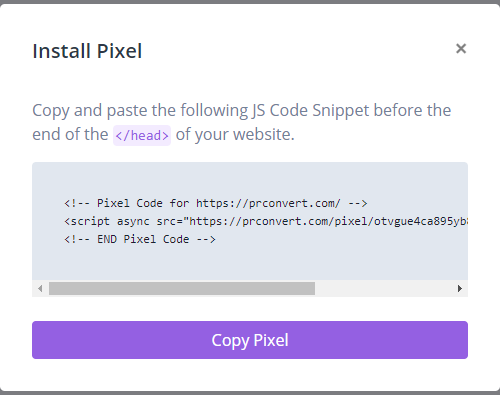
Once done, press Create, and a small "Install Pixel" form will appear.

This is the hardest part, but I will make it as simple as possible!
Click "Copy Pixel", as we need to paste the javascript code in thesection, which we could do manually but for training purposes we will use a plugin.
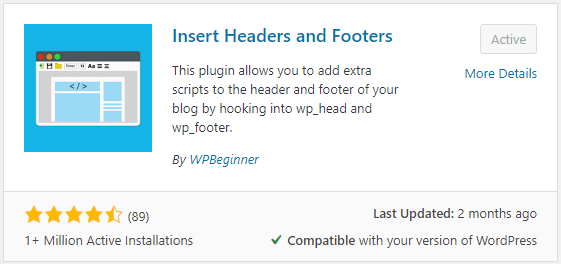
Head over to the website and locate "Plugins". Click add New, and search for "Insert Headers and footers".

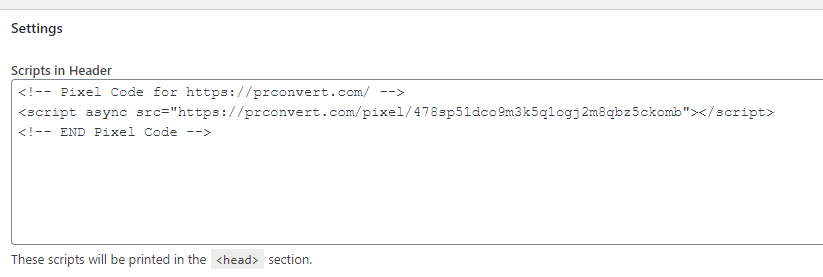
Install It, Activate it and navigate to "Settings". Look for the plugin we just installed and click it.
Now, copy our code in the Head section, and Click Save.

Well done, you have successfully installed PrConvert on your website, and you can now start making Notifications! They'll automatically apply to the connected URL.